Why should you know how to test a car battery? It’s so important to check your car’s battery regularly just to make sure it’s in the best condition before you hit the road. This simple action can help you avoid unexpected problems and ensure you stay safe on the road.
You can easily check the charge level using a multimeter.However, battery health is more complex to determine.An advanced load tester is often used to determine battery’s status of health (SOH). And unlike the voltage readings, SOH accounts for the cold start capability, residual battery capacity, and the charge acceptance.
Batteries used in cars have advanced in chemistry over the years. New technologies, such as the Absorbent Glass Mat (AGM) and Lithium-Ion Phosphate (LiFEPO4), are dominating the industry. They require better and more modern test devices for battery voltage.
This article focuses on how to test a car battery safely using a multimeter and modern equipment to conduct a load test.To test a car battery safely, use a multimeter to check voltage (12.6V+ is healthy), then perform a load test to confirm performance under stress. Let’s dive in.
Tools You Need
The success of car battery testing depends on the tools and equipment you use. Before proceeding, tick the following checklist for the tools you will need for voltage test and advanced load testing:
- Digital multimeter (DC voltage mode)
- Safety gloves
- Wire brush or terminal cleaner (battery terminal is often corroded)
- Battery load tester
Testing a Car Battery: Step-by-Step
Knowing how to test a car battery is a straightforward process; You don’t require any mechanical knowledge to accomplish it. Follow these steps to test your car’s battery.
Step 1: Perform a Visual Inspection
Are you still wondering how to test a car battery? Well, a visual inspection is a simple battery test you can perform to check the health status of your car’s battery. While it is largely inaccurate, it can give insights into what to expect when you finally get a multimeter and load tester.
- Start by checking the battery temperature. It should be cool to the touch and have no visible leaks (for flooded lead-acid batteries). Do not test battery voltage if the temperature is high, that is, the car has been recently driven.
- Check the battery terminals for corrosion and clean them using a wire brush if visibly corroded.
- Check for cracks or bulges on the battery. These are an indication of a damaged car battery
If you notice swelling or leakage, skip testing and replace the battery immediately.
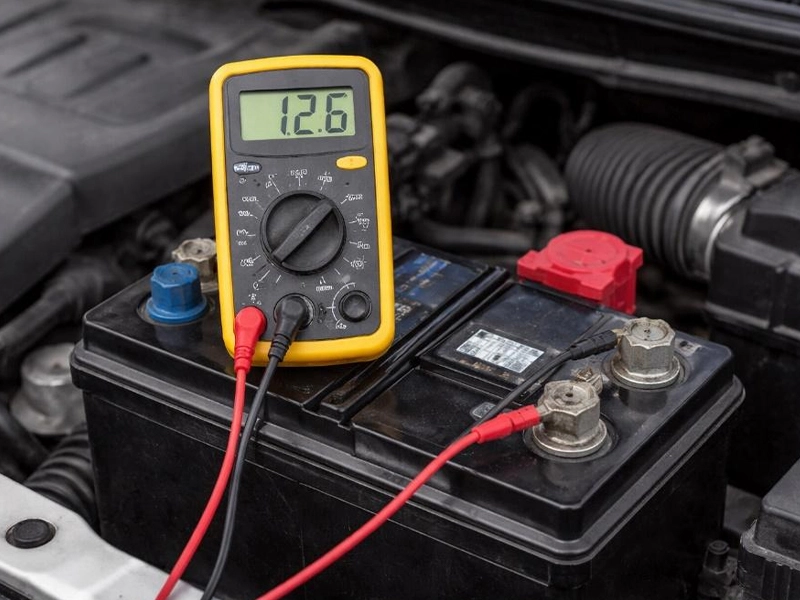
Step 2: Test Battery Voltage
To conduct a car battery voltage testing, turn off the car’s engine to avoid false readings. Additionally, ensure all other electrical accessories are turned off then proceed as follows:
- Turn multimeter into the DC voltage mode and set the voltage measurement range to be at least 20V.
- Connect the multimeter probes, both red and black, to the battery’s terminals; the red probe goes to the positive terminal and the black one to the negative terminal.
- Read the voltage shown on the multimeter.
However, voltage alone does not confirm battery health.
What results do you expect and does it mean?
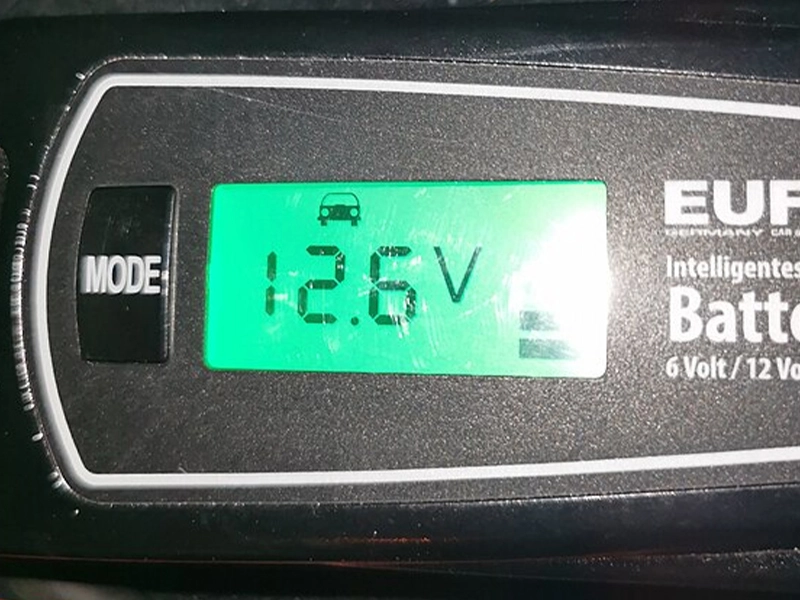
- 6–12.8V – the battery is fully charged and could signify a healthy battery.
- 4V – battery is about 75% charged.
- 2–12.4V – low charge; needs charging
- <12.0V – battery is discharged or faulty
You now have the battery voltage test results, but that is not enough to conclude that the battery’s health is good or bad. Just one more step to make a decision.
Turn the headlights on for about 2 minutes and repeat the test. A high voltage drop implies a weak battery. Also, low voltage does not necessarily imply a bad battery as that can be caused by the car’s electrical systems draining power from the battery. Recharge the battery and repeat the above test to clear any doubts.
Step 3: Perform Load Testing
A load test is the best way to determine how a car’s battery performs under loading conditions, and it is the last part in this article on how to test a car battery. You can achieve this by cranking the car and repeating the battery voltage measurements as stated earlier or by using an advanced load tester.
Crank Testing
Procedure:
- Connect multimeter as before when performing voltage test.
- Crank the engine and observe the difference in voltage reading on the multimeter.
A voltage drop up to 10V is acceptable and shows the battery is in good. However, if the battery voltage drops to below 9.5V, the battery is weak or faulty and you need to budget for replacement.
Load Testing Using Advanced Testers
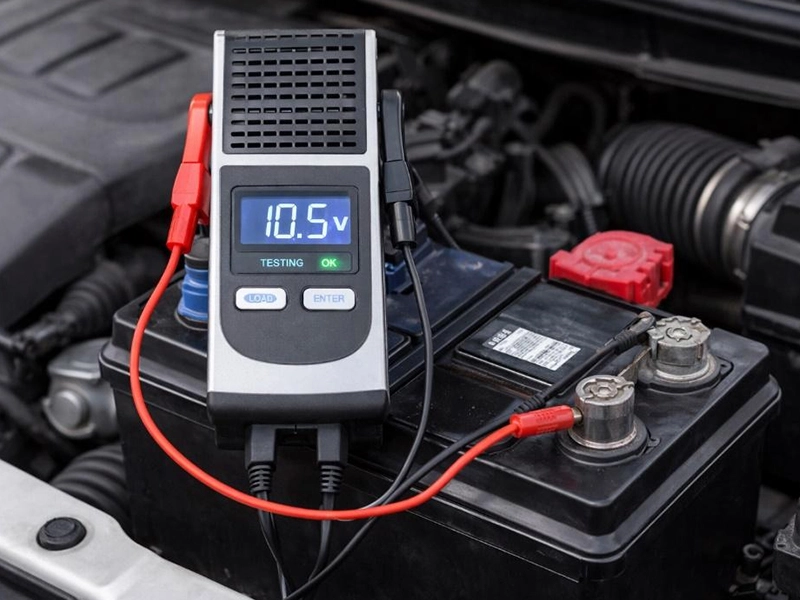
This method involves using load testers, which apply a controlled load to the battery. It is the surest way of determining the battery’s SOH and overall performance when subjected to real-world conditions.
Proceed as follows to complete battery load testing safely:
- Connect a load tester to the battery terminals as apply a load matching the battery’s rated capacity. Do not exceed rated load.
- Measure the voltage drop over time.
Load testing identifies weak or failing cells and evaluates voltage stability under operational conditions. A healthy car battery should keep a relatively constant voltage over time when connected to a rated load. If the voltage drops fast, the battery is weak and you should replace it.
Step 4: (Optional) Test Internal Resistance
At this point you already know how to test a car battery, but that is not all. A car battery test also involves measuring its internal resistance and comparing it against the stated value. A higher internal resistance shows a faulty battery. You will require a battery tester (conductance tester) for this part since a multimeter is incapable of giving an accurate result. Use the procedure provided below to complete this battery test.
- Connect the tester; the red probe goes to the positive terminal and the black one to the negative terminal.
- Input battery details (if prompted, depending on the battery tester you are using); choose the battery type and enter the rated cold cranking amperes.
- Run the test to show battery’s health, voltage, and internal resistance (mΩ).
The internal resistance of batteries varies depending on the battery type and the manufacturer. Some, such as AGMs, typically give values in the 2-5 mΩ range, while others, such as LiFePO4, have internal resistances ranging from 1-3 mΩ. Lead-acid batteries have the highest internal resistance, typically within 5 to 15 mΩ, or even higher. Note this down and compare your values only with the manufacturer’s specifications.
Signs You Need a New Battery
Battery voltage and load testing determine the next action. Here are some tips to help you in decision-making:
- Voltage below 12V after charging (battery is weak; you should replace)
- Fails cranking test (voltage drops to <9.5V)
- Batteries older than 3–5 years – car batteries generally degrade over time.
- Frequent jump-starts are required, or cranking is taking longer than usual
- Visible swelling or leakage on the casing
Common Mistakes When Testing Car Battery
It is crucial to get how to test a car battery right in your first attempt. Here are some of the most common mistakes to avoid:
- Testing battery when engine is running– this is likely to give you higher reading when testing battery voltage. Engine drives an alternator, which charges the battery.
- Testing battery with accessories on– unless you want to test your batteries performance under load, all electrical systems should be turned off. Battery under load is likely to give low voltage readings. Even headlights and turn signals should be switched off.
- Testing battery with corroded terminals– Corrosion on battery terminals increases resistance and might also cause short circuit. This means you will likely get low voltages on your multimeter.
- Taking instantaneous reading– Do not record the indicated value as soon as you connect multimeter probes to the battery terminals. Allow the readings to stabilize and take the final value.
- Misinterpreting test results– do not assume that low battery voltage means a bad battery. This is a wrong assumption since the battery might have been drained by electrical accessories.
- Basing results on visual inspection– a car battery may appear to be in good condition but fails under load. You cannot determine battery health from its physical appearance only. Always perform voltage and load testing.
Car Battery Test: The Bottomline
Knowing how to test a car battery is crucial to always ensure your ride is smooth and your journey uneventful. With the step-by-step battery testing procedure in this article, you can perform battery testing safely at home.
Fortunately, advanced battery load testers for determining the SOH of your battery are available in the market. Also, affordable multimeters are available as the alternative. Armed with the procedure outlined and appropriate equipment, conduct regular battery checks and testing. Use your results for better decision-making.
FAQs
How often should you test a car battery? (Recommended schedule)
The answer depends on how you use your car and how long its battery has lasted. The general idea is to test at least once every 6 months, but if the battery is showing aging signs, test it every 3-4 months.
Can a battery show good voltage but still be bad?
Yes. High voltage reading on a multimeter is not a sign of a good battery. It simply means the battery is fully charged. Perform a load test as the surest way to determine the battery’s health.
What are the signs of a bad car battery?
You know your car battery is failing when the engine takes a longer time than usual to crank or when you require frequent jumpstarts. Also, in some car models, the dashboard battery warning lights illuminates to warn you as the driver about the battery’s health.
Does idling your car charge the battery?
Yes and no. Idling your car will ideally charge the battery since the alternator is running. This is true for some cars but not all. Others have advanced battery management systems that prevent battery charging at low rpms.